Category Archives: Recipes

Sweet & Sauteed Brussels Sprouts

IMG_8430(1)

Who eats plain old steamed or boiled brussels sprouts anymore? Not me! I had it once and I am OVER it. The good news is that there are so many ways to prepare these guys, and a creative saute is one of the easiest.

1 to 1 1/2 cups brussels sprouts, stems trimmed and cut in halves or quarters
1 tbsp honey or agave nectar
1-2 tbsp walnuts (optional)
safflower or canola oil
salt and pepper

Mix all the ingredients in a bowl. Fire up a pan and heat up the oil, enough to coat the bottom of the pan. Toss in your ingredients and saute until brussels sprouts start to turn bright green (or to your liking). Remove from heat and eat!

Soooo easy and yummy! This makes a great side dish or just about any meal. You can add chilies to spice it up. You can use soy sauce and/or sriracha to season for an Asian twist. Or add cumin for a Mexican or Indian flair.

Ooooh the possibilities! Enjoy!

Tagged , , ,

Brussels Sprouts: Incredibly Versatile

I can only recall one time during my entire childhood when I ate Brussels sprouts. Brussels sprouts were a mystery to me. I wasn’t sure what they looked like — I think I had envisioned something more along the lines of bean sprouts or alfalfa sprouts. All I knew about them is that kids hated them. My friends hated them. Brussels sprouts: BAD!

My first taste did nothing to convince me that what I had heard was wrong. Blech. Plain steamed Brussels sprouts are kind of the worst. Cut to 20 years later and I’m completely on Team Brussels Sprouts! I’ll be sharing three super simple recipes soon. Creativity is required when you’ve got a Costco-sized bag to go through! These are three different ways to prepare/cook these guys and serve as a basis for you to build upon or easily modify to your liking.

Sauteed & Sweet

IMG_8430(1)

Roasted “Chips”

IMG_8431

Raw & Crunchy

IMG_8455

Stay tuned!

Tagged , ,

It’s My Annual Vegan Cookie Baking Day!

I don’t like baking. This is well-documented. I would say that I tolerate it now and I do find it a little cathartic, but that’s because I have finally had some success in my baking. Still, I try to avoid it altogether! But during the holidays, I’ll dust off the cookie sheets and bake some cookies to share with my pals.

IMG_8019

I first posted about these cookies a couple years ago. I’ll make a bold statement and say the cookies are better, but the recipe is the same!

Vegan German Chocolate Cookies
adapted from Bake and Destroy

Ingredients

2 cups all-purpose flour
⅓ cup unsweetened cocoa powder
½ teaspoon baking soda
½ teaspoon baking powder
¾ teaspoon salt
1 ½ cups sugar
⅔ cup vanilla almond milk or soy milk
⅔ cup canola oil
2 tablespoons ground flax meal
1 teaspoon vanilla extract
1 ⅓ cups rolled oats
¾ cup vegan chocolate chips
½ cup shredded coconut
½ cup chopped walnuts or pecans

Directions

1. Preheat oven to 350°. Line baking sheets with parchment paper.

2. In a large bowl, sift together the flour, cocoa powder, baking soda, baking powder, and salt.

3. In a medium bowl, whisk together the sugar, milk, oil, flax meal, and vanilla extract. Whisk for about 2 minutes, until the mixture thickens.

4. Stir the wet ingredients into the flour mixture until just mixed.

5. Fold in the oats, chocolate chips, coconut, and walnuts.

6. Drop by tablespoons (I used a cookie dough scooper thingy) onto the prepared baking sheets and bake for 10 to 12 minutes, until the edges are set up.

7. Let cool on the pans for 5 minutes, then let cool completely on wire racks.

Hope you guys enjoy and have a great holiday season! -Melissa

Tagged , , , ,

It’s Still Summer. Make an Eggplant Salad!

The days are getting shorter, kids are back in school, Labor Day just passed… but, hey! It’s still summer! And we still have fresh veggies from the backyard so I made a refreshing roasted eggplant salad to accompany dinner the other night.

eggplant salad

This is so easy to make (once you’ve roasted the eggplant) and goes with just about anything as a nice side dish.

Roasted Eggplant Salad

1 eggplant, roasted, cooled and chopped (use the skinny eggplants, not the fat ones)
1 large or 2 medium tomatoes, diced
1/2 small onion, diced
1 tbsp bit of fresh lemon juice1 tbsp olive oil
salt & pepper, to taste


You’ll need to roast the eggplant first and then let it cool. There are a few methods for toasting eggplants — grilling, carefully roasting over an open flame, or broiling in the oven (which is my personal preference).

eggplant salad

Put all your ingredients into a bowl and then mix it up. Easy as pie! Mmmm… pie…

I’m happy to say that I am back in the cooking spirit. Maybe it’s because the weather is starting to cool. Maybe it’s because I’ve been inspired. I’m just glad to start getting busy in the kitchen again!

xoxo
Melissa

Tagged , , , ,

Purple Yam Fries

Purple Yams

Purple yams: WTF?! They are actually very commonly used in Filipino desserts. We call it ube (pronounced ooh-beh, but if you say “oob” we’ll still know what you’re talking about) and we put this stuff in cake and ice cream and a bunch of other stuff! This post on Jun-blog sums up how it’s used in Filipino cuisine and it’s worth the read!

Anyway, I’m not here today to talk about dessert. I am here to talk about an easy and slightly savory way to enjoy this fantastic freak of nature! And it truly is fantastic: In addition to being boldly colored, purple yams have important antioxidant and anti-inflammatory properties. They’re also a great source of vitamin A and, on a smaller scale, potassium and calcium.

Purple Yam Fries

Ube (Purple Yam) Fries

1 purple yam
2-3 tsp safflower or canola oil
salt and any other spices you desire, to taste

1. Set your oven to 425 degrees.

2. Bake the yam, whole, for 45-60 minutes, until tender.

3. Let it cool.

You can eat the yams now if you want, just take off the skin (which should come off easily, or the yam should slide right out of it easily) and chow down! Or, you can move on to the next step to make the fries.

4. With skin removed, slice the potato into strips or whatever shape you desire. They might give off a weird odor: this is normal!

5. Gently coat the pieces in the oil and spices. Place in a single layer on a baking sheet, and bake again for another 15-25 minutes, until crispy. Check on them halfway through and flip over the pieces.

6. Serve hot!

I enjoyed these guys plain: the natural sweetness and starchiness of purple yams require no embellishment aside from a sprinkle of salt. If you’re into dipping stuff, I would recommend vegan mayo or vegan mayo with Sriracha for a nice kick.

This was the first time I really cooked and enjoyed purple yams as a non-dessert. They’re so much fun. I’d love to make purple mashed potatoes, purple potato chips, and of course, vegan ube desserts.

I love versatile foods!


//pagead2.googlesyndication.com/pagead/js/adsbygoogle.js //

Tagged , , ,

Juicing with Bitter Melon

I’m really excited because I have been invited by Williams-Sonoma to participate in their Juice Week! My mission was to share a recipe of a juice that “bites back” or contains a wild ingredient. What better ingredient to fulfill this mission than the enigmatic bitter melon?

I enlisted my Mom’s help with this since she juices regularly. Her recipes vary, but all of them have four basic ingredients: carrot, celery, cucumber and granny smith apple. She adds lemon and ginger for a nice punch. Ginger in itself is a wild ingredient that adds a spicy kick to any juice! All we did was add one bitter melon to the mix.

Juicing Bitter Melon

Basically Bitter Juice

Juice together the following ingredients:

1 bitter melon, de-seeded*
1 large cucumber
1 large carrot
1 Granny Smith apple
3 celery stalks
1/2 lemon with rind but remove the seeds
Ginger, to taste

*To remove the seeds from bitter melon, slice it in half, lengthwise, and then use a teaspoon to scoop out the seeds and membranes, leaving only the tough green skin.

IMG_1291

Here is what the juice looks like! The hue actually fluctuates between green and orange, depending on how everything is settled and the lighting. As for how it tastes, the apple is enough to give this juice a sweetness and offset some of the bitterness, and the spiciness of the ginger can be felt in the throat.

Although this recipe includes bitter melon, the bitterness is not at all an overpowering flavor. Everything melds together nicely in this combination. The addition of a second bitter melon will definitely add that punch, but it’s still not super overpowering. I love this about bitter melon: it plays well with others. Even when cooked with other vegetables or meats, it doesn’t contaminate the dish with its flavor.

The great thing about juicing is that you can get any combination of ingredients and use how much or how little of each one that you like. There’s no science or precision when my mom juices. This might be scary to some, but if you’re making the effort to juice at home, then take the opportunity to test out ingredients and measurements to develop “your” juice.

Our juicer is the Breville Juice Fountain Plus. After tying out other juicers, including a Vitamix, we found this one to be our favorite everyday juicer. It hasn’t let us down and I recommend it for its quality and cost compared to other juicers. It’s all up to your personal preference – and Williams-Sonoma has a great selection to choose from.

If you’re ever curious about bitter melon, you should be able to find them at Asian grocery stores. In the Chicago area, I recommend Tai Nam on Broadway or any of the grocery stores on Devon Ave. They are of great quality in the summertime since they are in season!

What crazy ingredients do you add to your juice? Let us know in the comments! –Melissa

Tagged , , , ,

Summer Favorite: Bitter Melon (Ampalaya)

It never truly feels like summer until we can start harvesting the veggies from my dad’s garden. I feel so lucky that we always had the freshest vegetables in the summer and even luckier that we had “weird” veggies like eggplant and long green beans along with the typical tomatoes.

I got really excited yesterday when I spotted freshly picked bitter melon or ampalaya in my mom and dad’s kitchen:

Bitter Melon

Not everyone is a fan of bitter melon because it’s, well, bitter. But there are lots of different ways to prepare it which equals a lot of chances for you to acquire a taste for it. One of the things I would like to try is adding it to juice recipes. It’ll kick the flavor up a notch!

Many people believe that bitter melon has health benefits, but there are also some things to consider if you have the desire to go on a bitter melon binge. Note that while it is supposed to help with diabetes, it can also interact with diabetes medication. And one of the things that I was always told is that it’s supposed to help alleviate those pesky cramps that ladies get, but this also means that it is somewhat of a blood thinner.

Here are two bitter melon recipes that reflect its versatility!

Bitter Melon Salad – This is a raw recipe that I usually make with tomato and onion, but I also modify it by using strawberry in place of tomato which results in a playful mixture of bitter and sweet flavors.

Bitter Melon Salad

Stuffed Bitter Melon – I am still so proud of this recipe! The bitter melon is stuffed with soy curls mixed with Asian and spicy flavors and then baked.

IMG_7520

What are your thoughts on bitter melon? Let us know in the comments! -Melissa

//pagead2.googlesyndication.com/pagead/js/adsbygoogle.js //

Tagged , ,

Cookies!

IMG_9872

Hi. My name is Melissa and I don’t like baking.

This has been true from the time I was 8, had mixed together some cake batter, and then was too terrified to put it in the oven.

Fast forward to last month, when I heard about the Great Food Blogger Cookie Swap.

The GREAT FOOD BLOGGER COOKIE SWAP brings together food bloggers from around the world in celebration of all things scrumptious. The premise is this: sign up. Receive the addresses of three other food bloggers. Send each of them one dozen delicious homemade cookies. Receive three different boxes of scrumptious cookies from other bloggers. Eat them all yourself (or, you know, share. If you want. No judgement either way.) Post your cookie recipe on your blog. See everyone else’s cookie recipes. Salivate. Get lots of great ideas for next year’s cookie swap. Rinse and repeat.

I signed up for the online swap before I could talk myself out of it. Then, I panicked. Omg! The last time I baked cookies was the Snickerdoodle experiment that took place on Snowmageddon 2011. This was going to be interesting.

Since I’m a cookie baking novice, I had to find a recipe to follow. I found an awesome recipe in Bake and Destroy which is so easy and unbelievably vegan! Super huge THANK YOU to Joelen of What’s Cookin’ Chicago for giving me this book!

1185087_10151821239447517_1038038527_n

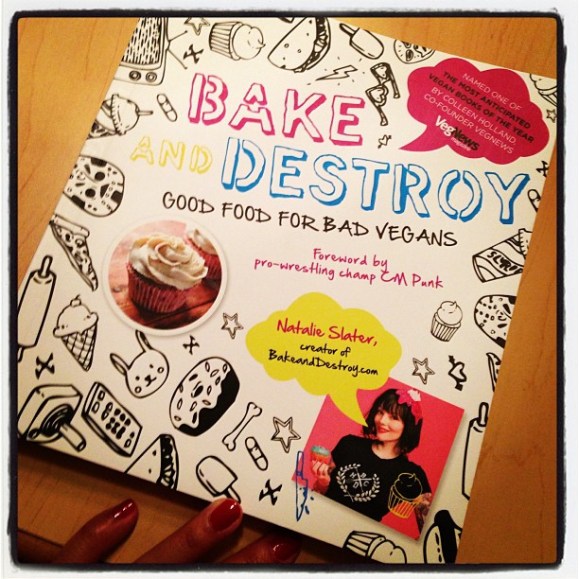
Vegans! You gotta get this book and check out BakeandDestroy.com. For the cookie swap (and also for the Chicago Food Swap, which I will recap in a few days), I followed Natalie Slater’s recipe for German’s Chocolate Cookies. I made a couple tiny changes to the recipe for two reasons: 1) I wanted them to be soy-free so that my sister could try some and 2) I was missing some ingredients.

Before I get into the recipe, I need to emphasize how great this book is. The recipes are awesome and range from breakfast to casseroles to snacks to dips and sauces. GIFT IT TO YOURSELF AND YOUR FRIENDS FOR CHRISTMAS (or just because)!

Vegan German Chocolate Cookies
adapted from Bake and Destroy

Ingredients

2 cups all-purpose flour
⅓ cup unsweetened cocoa powder
½ teaspoon baking soda
½ teaspoon baking powder
¾ teaspoon salt
1 ½ cups sugar
⅔ cup vanilla almond milk or soy milk
⅔ cup canola oil
2 tablespoons ground flax meal
1 teaspoon vanilla extract
1 ⅓ cups rolled oats
¾ cup vegan chocolate chips
½ cup shredded coconut
½ cup chopped walnuts or pecans

Directions

1. Preheat oven to 350°. Line baking sheets with parchment paper.

2. In a large bowl, sift together the flour, cocoa powder, baking soda, baking powder, and salt.

3. In a medium bowl, whisk together the sugar, milk, oil, flax meal, and vanilla extract. Whisk for about 2 minutes, until the mixture thickens.

4. Stir the wet ingredients into the flour mixture until just mixed.

5. Fold in the oats, chocolate chips, coconut, and walnuts.

6. Drop by tablespoons (I used a cookie dough scooper thingy) onto the prepared baking sheets and bake for 10 to 12 minutes, until the edges are set up.

7. Let cool on the pans for 5 minutes, then let cool completely on the wire racks.

I was so happy with how these turned out. I may have some baking skillz after all! I got some great treats in return and will be giving kudos to my fellow food blogger cookie swappers in the coming weeks. –Melissa

Tagged , , , , , , , , , ,

Easy Roasted Brussels Sprouts

We write about Brussels sprouts quite a bit, and it’s because they are freaking delicious! They’re definitely a winter veggie for me. I see a Brussels sprout and I think of Thanksgiving and Christmas and Sunday dinners. I’ve toyed around with several recipes, but I finally found one that I think is going to be my go-to recipe.

IMG_9819

Easy Roasted Brussels Sprouts
(adapted from About.com > Vegetarian food)

1 1/2 cup Brussels sprouts, cut in half
2 tbsp balsamic vinegar
2 tbsp safflower or canola oil
1/2 tsp mustard
salt and pepper, to taste

Pre-heat oven to 375 degrees.

Whisk together the vinegar, salt and pepper together in a small bowl. Slowly incorporate the olive oil until a dressing is formed.

Gently toss the Brussels sprouts in the dressing.

Place in a single layer on a baking sheet. Sprinkle some salt on those babies if you’d like.

Bake for 20 minutes, turning once. Sprouts are done when they are lightly browned.

zOMG. These were so good! The mustard added a nice little pop of flavor that’s been missing from other recipes I’ve tried. The best thing about this is that they can easily be served with any meal, from a vegan roast to pasta to tofu to pizza! Yum. –Melissa

Tagged , , , , , , , , , , , ,

Monika’s Roasted Tomato Soup

20131104_175152

The weather in Chicago has been crisp and cool and sometimes rainy. The leaves are changing color and we’ve started to curl up under our comforters. We are also – HORROR! – wearing socks again. It’s definitely the type of weather that makes me crave warm comfort food.

Do you know what’s more comforting than comfort food? Good friends! And good friends share awesome vegan recipes with their vegan friends. Today’s recipe was graciously shared with me by Monika, my good friend and colleague. Tomato soup is definitely a great comfort food and a great way to use up those summer tomatoes that are still lingering in your kitchen!

Monika’s Roasted Tomato Soup

8 Tomatoes
1 tbsp Balsamic vinegar
2 tbsp Olive Oil
1-1/2 tsp Pepper
1-1/2 tsp Salt
1-1/2 tsp Sugar
2-3 Garlic cloves finely chopped
2 tbsp Basil leaves finely chopped (fresh or dry)
1 Onion finely chopped
1.5-2 Carrots finely chopped

Stock/broth:
3 cups hot water
1.5 veggie bouillon cube

Optional:
Vinegar or lemon (if soup tastes too sweet)

Clean the tomatoes  and remove the stem.  Place in an oven safe dish and pour boiling water over the tomatoes. Keep the tomatoes in the dish for approximately 30-60 seconds. Remove from the dish and peel the skin. Cut the tomatoes in half and set aside.

Turn on the oven to 350F as you prepare the baking sheet. Place the tomato halves on  the sheet. Sprinkle tomatoes with salt, pepper, sugar, balsamic vinegar and olive oil.  Bake in the oven for 30-60 mins or until completely soft.

Melt olive oil in a large saucepan over medium-low heat. Add onion, carrots, garlic, and basil. Cook, stirring, until golden brown, set aside.

Mix the stock, set aside.

Remove the tomatoes from the oven, set aside to cool and bring out the food processor/blender.

In a large bowl add: roasted tomatoes, onion/carrots/garlic/basil and process with blender. Add stock, and process again.

Pour the soup into a saucepan and cook over medium-low heat for 15-20 mins. Add salt, pepper as desired. If soup tastes too sweet add a splash of vinegar or lemon.

Super duper tips from Monika:

  • The more time the soup is “cooked/warmed up” the better it will taste.
  • The soup was even more tasty the next day!

I’m so grateful that Monika shared this recipe with me and gave me the chance to share it with you. I can’t wait to try this at home! –Melissa

Tagged , , , , , , ,